

當SwiftUI首次推出時,引起我興趣的一個相當棒的功能就是即時預覽功能。此功能使開發者能夠在Xcode中直接預覽任何視圖的使用者介面,完全不需要模擬器。
在Xcode 15之前,預覽功能僅限於SwiftUI框架。然而,隨著最新版Xcode的發布,蘋果將此功能的利用擴展到UIKit。
在這個教程中,讓我們看看你如何在開發 UIKit apps時使用此預覽功能。
使用 #Preview 預覽視圖控制器
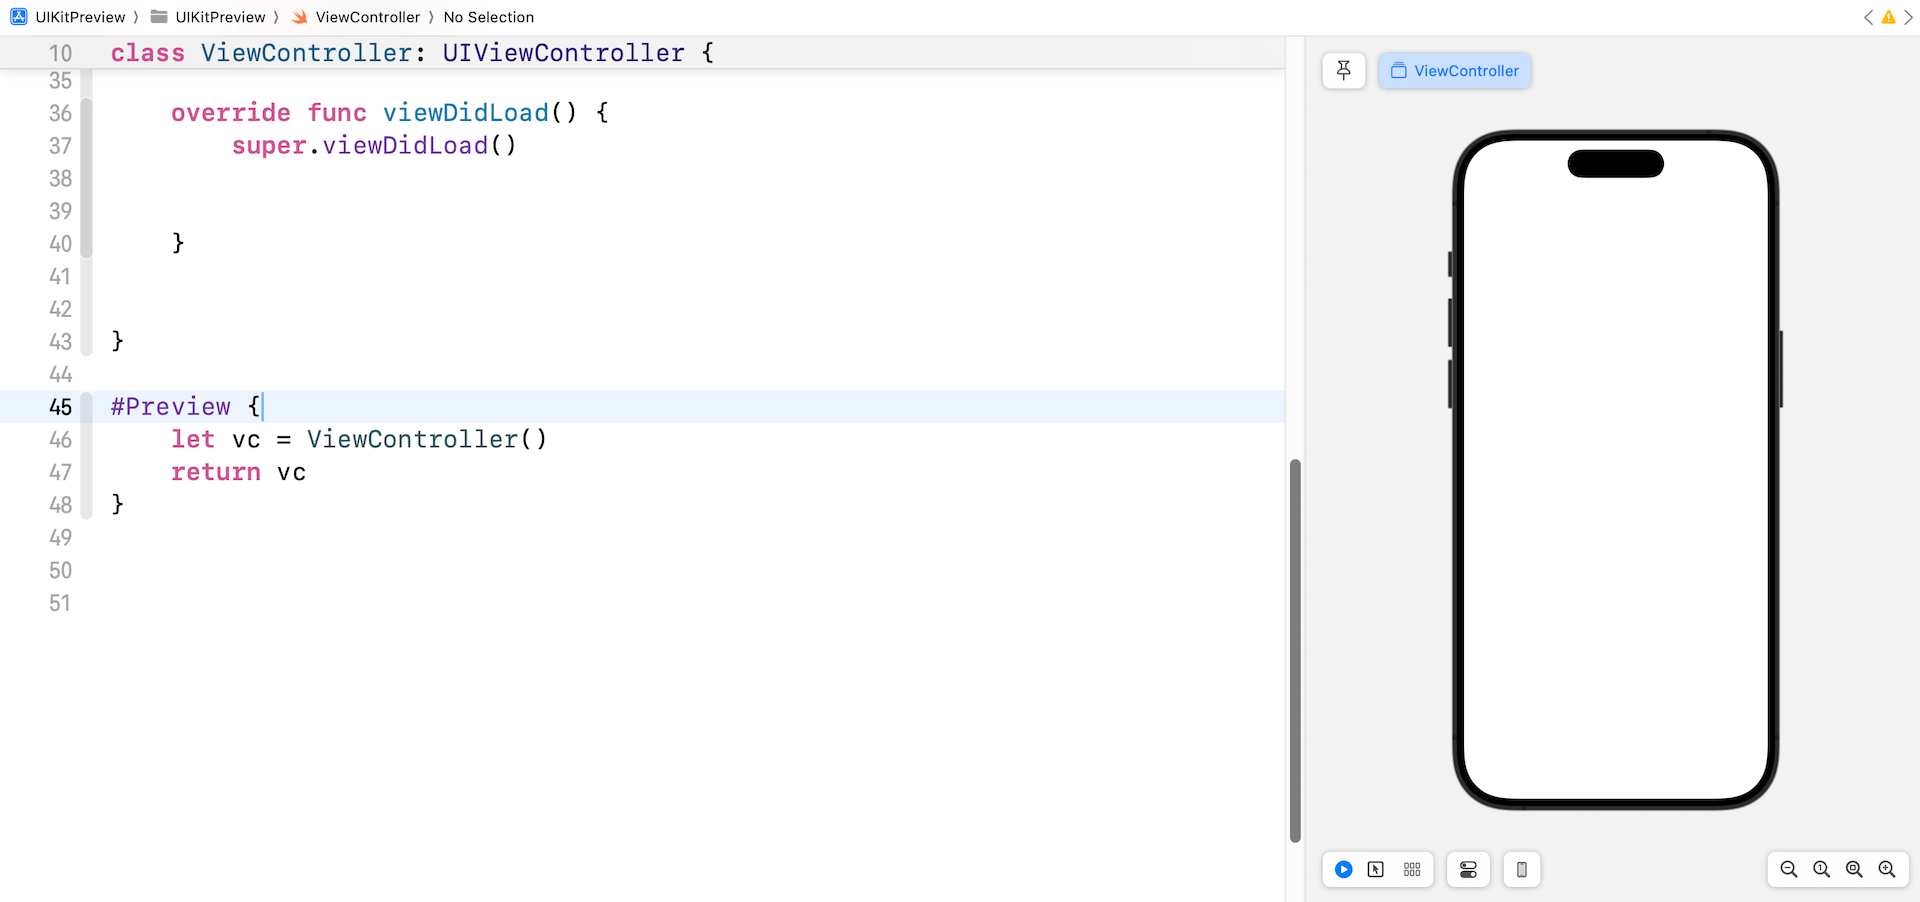
要在Xcode中預覽UIKit視圖或視圖控制器,你需要做的就是使用#Preview宏設置一個預覽代碼塊。下面是一個例子:
#Preview {
    let vc = ViewController()
    return vc
}
對於有使用SwiftUI中的#Preview功能經驗的人來說,語法應該相當熟悉。當你輸入預覽程式碼後,Xcode會顯示一個額外的面板,提供你的視圖控制器的預覽。
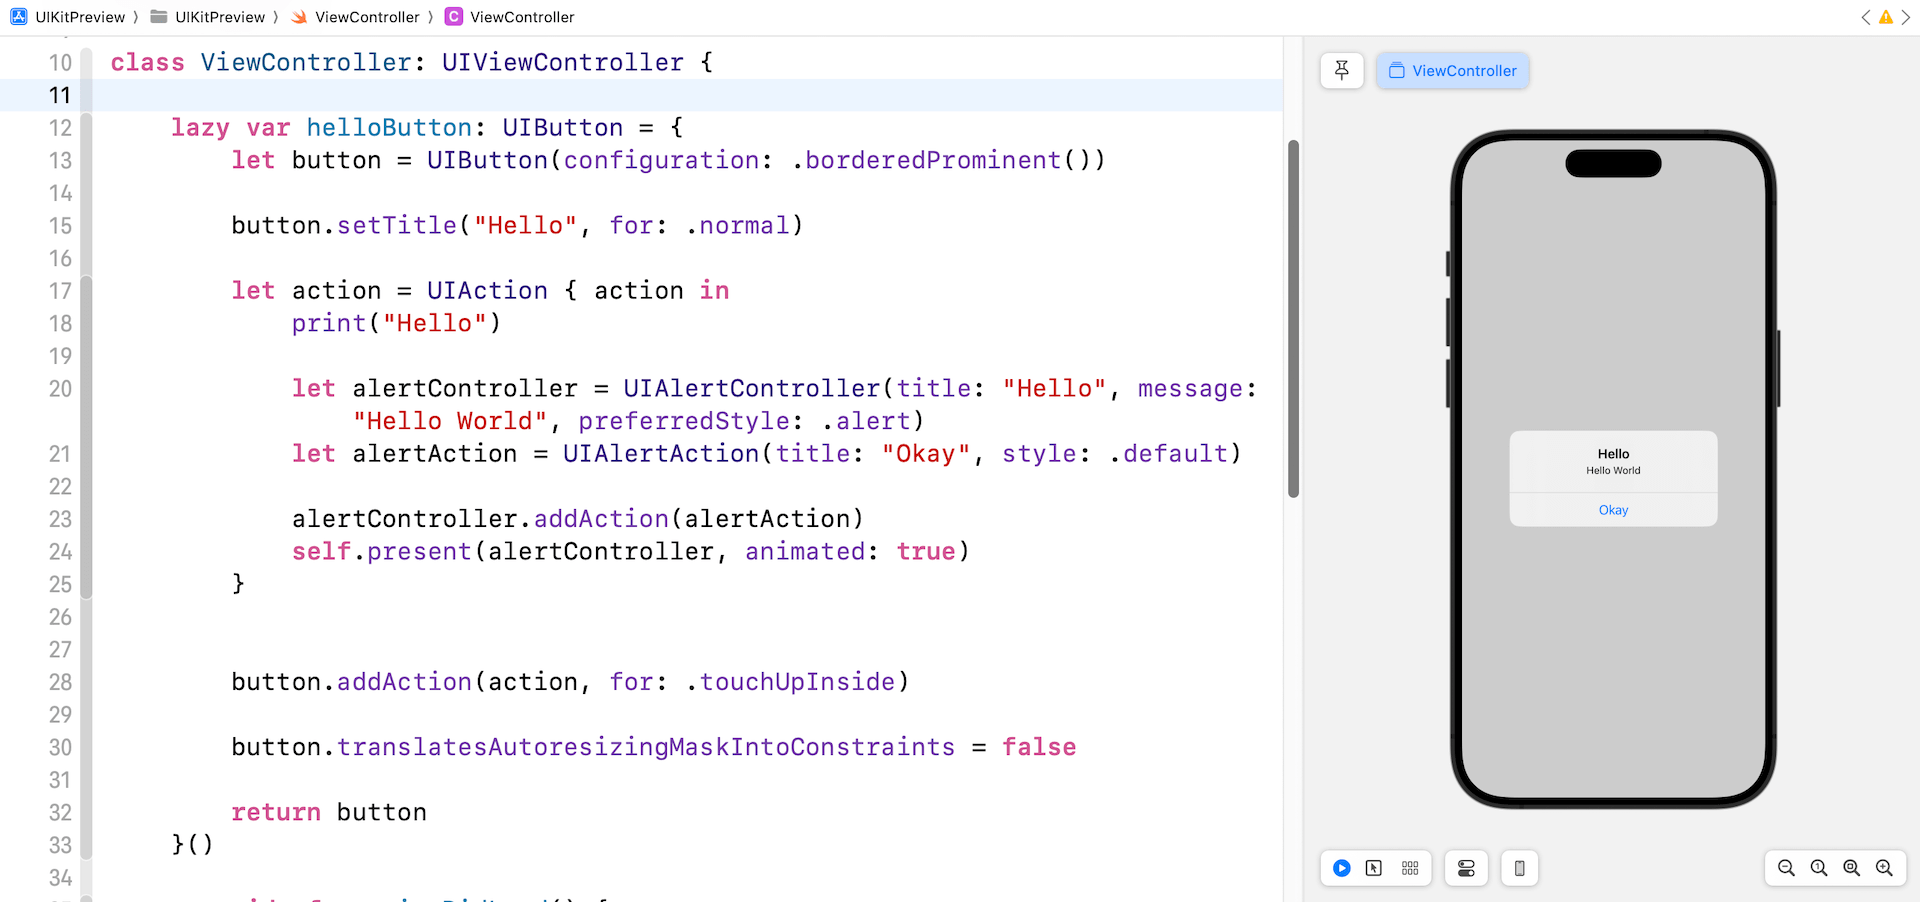
當你修改ViewController的程式碼時,Xcode應該會立即展示變化。例如,你可以嘗試修改以下的程式碼:
class ViewController: UIViewController {

    lazy var helloButton: UIButton = {
        let button = UIButton(configuration: .borderedProminent())

        button.setTitle("Hello", for: .normal)

        let action = UIAction { action in
            print("Hello")

            let alertController = UIAlertController(title: "Hello", message: "Hello World", preferredStyle: .alert)
            let alertAction = UIAlertAction(title: "Okay", style: .default)

            alertController.addAction(alertAction)
            self.present(alertController, animated: true)
        }


        button.addAction(action, for: .touchUpInside)

        button.translatesAutoresizingMaskIntoConstraints = false

        return button
    }()

    override func viewDidLoad() {
        super.viewDidLoad()

        self.view.addSubview(helloButton)

        helloButton.centerXAnchor.constraint(equalTo: view.centerXAnchor, constant: 0).isActive = true
        helloButton.centerYAnchor.constraint(equalTo: view.centerYAnchor, constant: 0).isActive = true

    }

}
預覽面板將會顯示一個寫著 "Hello" 的按鈕。如同在SwiftUI開發中,你可以直接在預覽中檢查使用者介面。如果你按下 "Hello" 按鈕,一個警告或是提醒將會彈出。
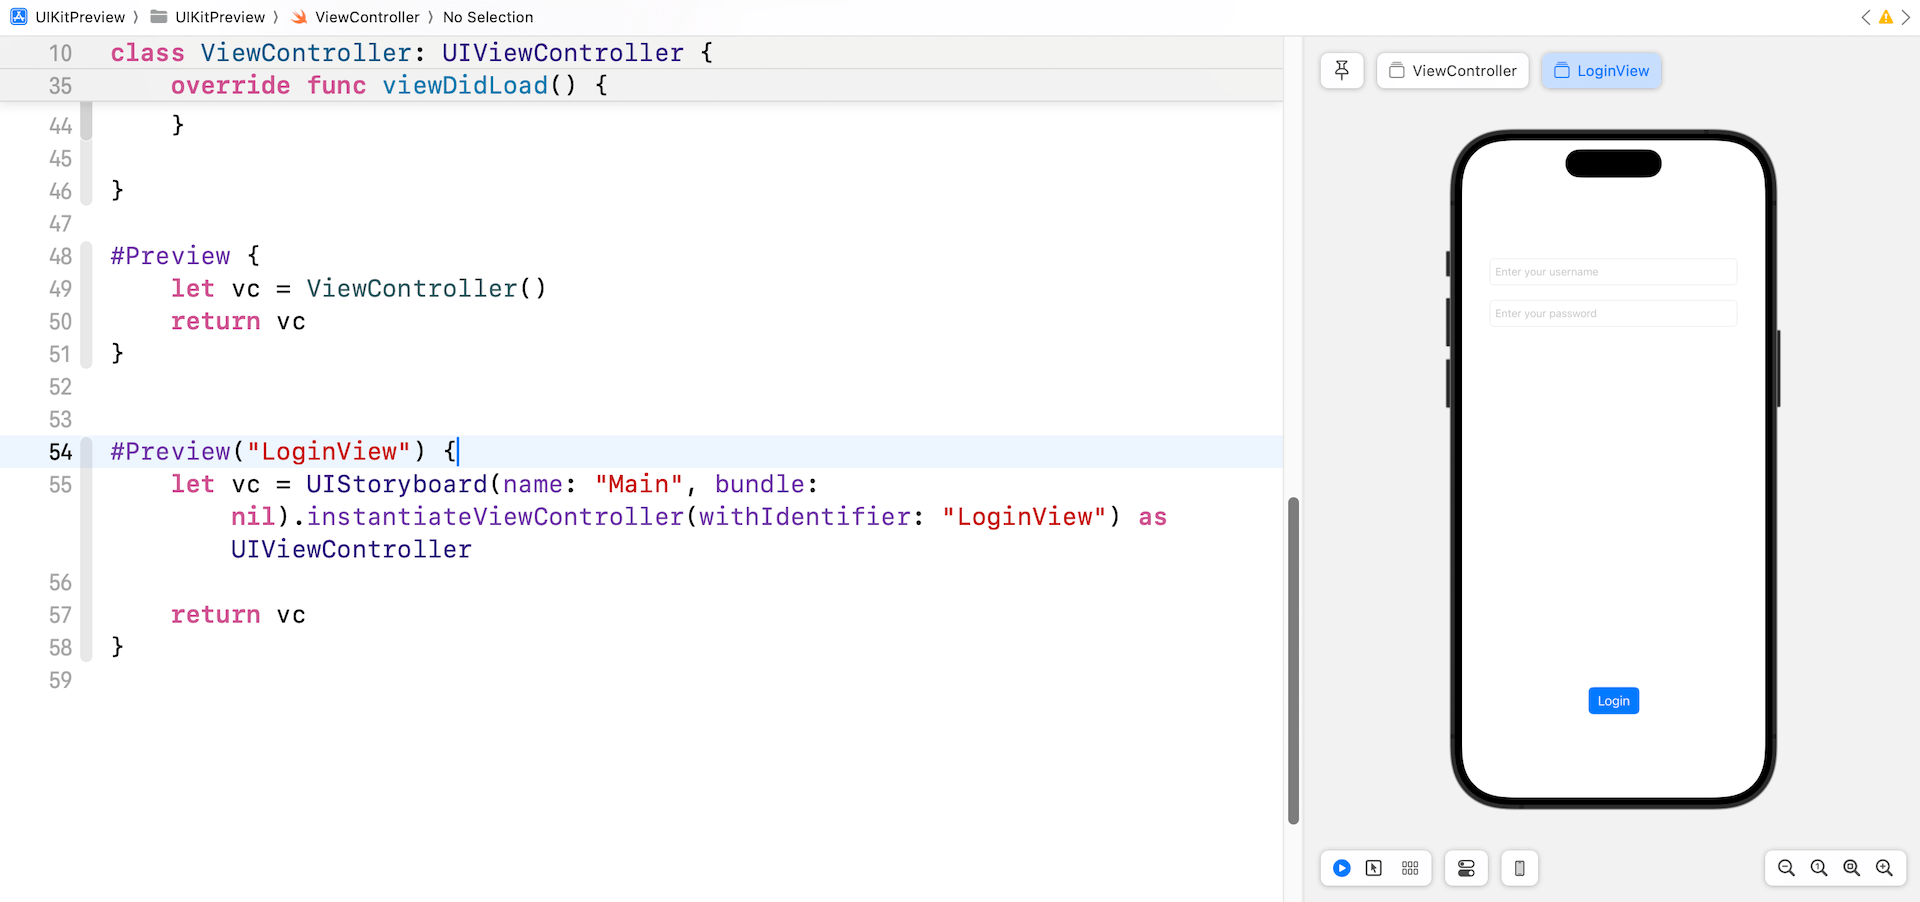
在介面建立器中預覽視圖控制器
#Preview宏也可以用來預覽在介面建立器(或故事板)中設計的視圖控制器。假設你已經創建了一個視圖控制器,並配置了一個故事板ID,你可以寫以下的程式碼來在Xcode中預覽它:
#Preview("LoginView") {
    let vc = UIStoryboard(name: "Main", bundle: nil).instantiateViewController(withIdentifier: "LoginView") as UIViewController

    return vc
}
你使用了 instantiateViewController 方法來實例化視圖控制器並在Xcode中預覽它。選擇性地,你可以給預覽一個名稱(例如:LoginView)。
總結
隨著Xcode 15的釋出,蘋果將原先只有在SwiftUI中才有的即時預覽功能,也擴展到了UIKit。開發者現在可以透過#Preview macro,在Xcode中預覽任何UIKit視圖或視圖控制器的使用者介面,這消除了使用模擬器的必要。此功能也擴及到在介面建立器或故事板中設計的視圖控制器。請充分利用此預覽功能來加速你的UIKit開發過程!


